Character-Based LCD Display
The lcd_pcf8574 and lcd_gpio display components allow you to use HD44780-compatible, character-based LCDs
with ESPHome. This component is only for LCDs that display individual characters on a screen
(usually 8-40 columns and 2-4 rows), and not for LCDs that can control each pixel individually.
NOTE
Multiple versions of the display exist, supporting different character sets:
- HD44780UA00 English-Japanese which includes katakana characters, some Greek letters and mathematical symbols
- HD44780UA02 English-European which includes Greek, Cyrillic and Western European characters (with some diacritics)
- HD44780UBxx custom, manufacturer-specific character sets
It is also possible to add eight user-defined characters.
lcd_pcf8574 Component
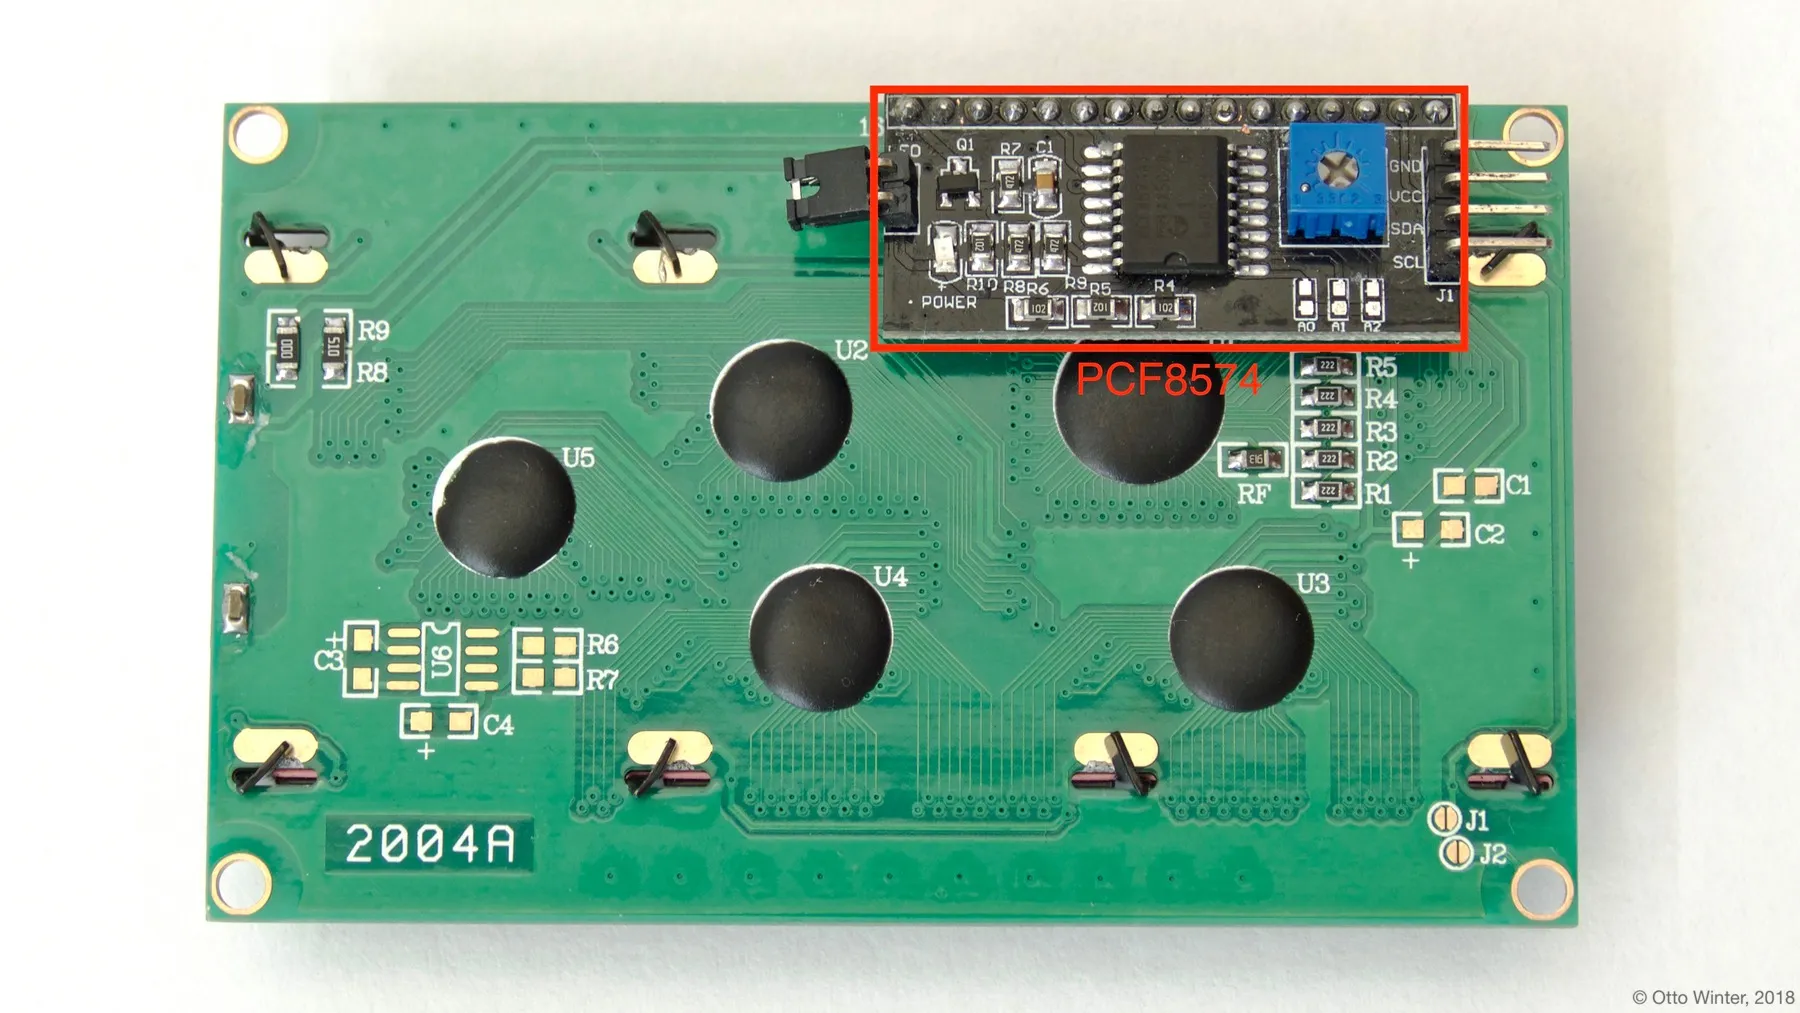
Section titled “lcd_pcf8574 Component”lcd_pcf8574 is for LCD displays with a PCF8574 GPIO expander module connected to all the data pins. This has the
benefit that you only need to connect two data wires to the ESP instead of the six or ten as with the lcd_gpio Component.
The communication happens via I²C Bus, you need to have an i2c: section in your configuration.
# Example configuration entryi2c: sda: D0 scl: D1
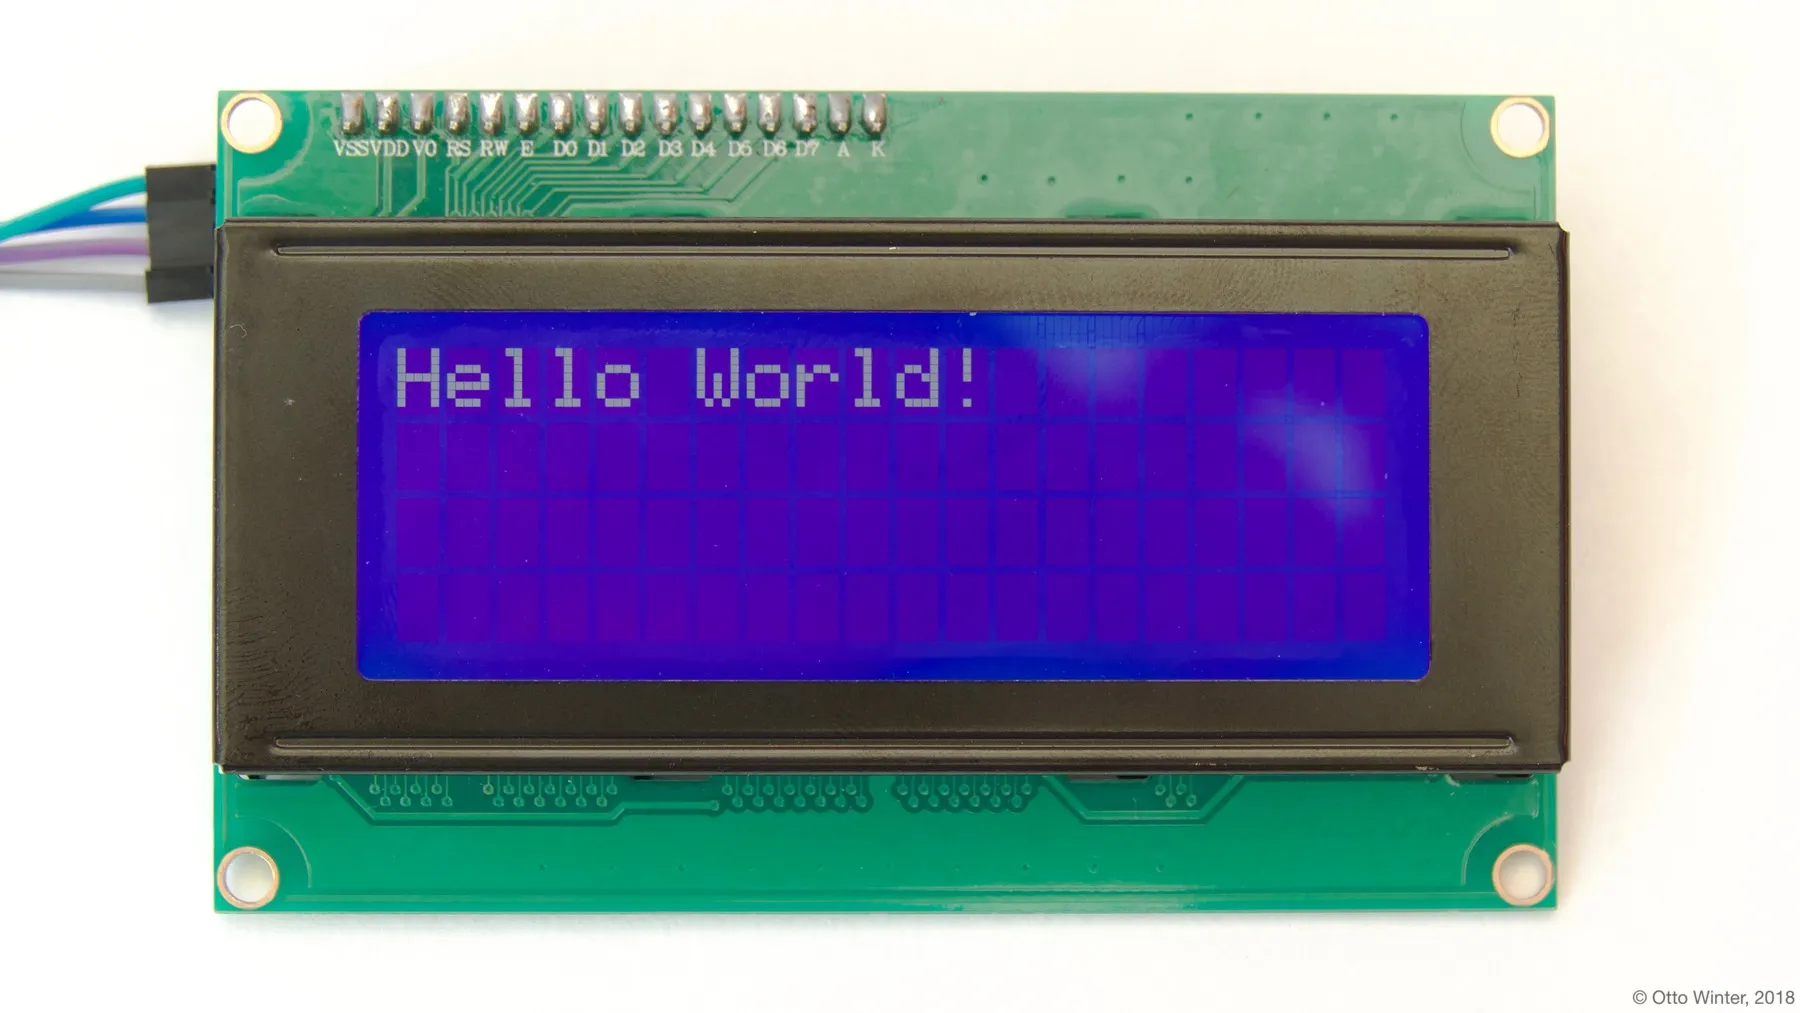
display: - platform: lcd_pcf8574 dimensions: 20x4 address: 0x27 lambda: |- it.print("Hello World!");Configuration variables
Section titled “Configuration variables”-
dimensions (Required, string): The dimensions of the display with
COLUMNSxROWS. If you’re not sure, power the display up and just count them. -
address (Optional, int): The I²C address of the PCF8574 chip, defaults to
0x3F. -
lambda (Optional, lambda): The lambda to use for rendering the content on the display. See Rendering Lambda for more information.
-
update_interval (Optional, Time): The interval to re-draw the screen. Defaults to
1s. -
id (Optional, ID): Manually specify the ID used for code generation.
NOTE
If you’re not seeing anything on the display, try turning the contrast potentiometer around on the PCF8574 board.
lcd_gpio Component
Section titled “lcd_gpio Component”The lcd_gpio version of this component addresses the screen directly and does not employ a GPIO expander module.
Each of the data pins of the LCD needs a dedicated GPIO pin on the ESP. Connecting the screen this way offers
faster refresh, especially in conjunction with an LCD Menu.

# Example configuration entrydisplay: - platform: lcd_gpio dimensions: 20x4 data_pins: - GPIOXX - GPIOXX - GPIOXX - GPIOXX enable_pin: GPIOXX rs_pin: GPIOXX lambda: |- it.print("Hello World!");Configuration variables
Section titled “Configuration variables”-
dimensions (Required, string): The dimensions of the display with
COLUMNSxROWS. If you’re not sure, power the display on, turn contrast high up and just count them. -
data_pins (Required, list of pins): A list of the data pins you have hooked up to the LCD. The list can either be 4 items long (operating in 4-bit mode with either the first 4 data pins connected or the last 4 data pins connected), or 8 items long (when you have connected all 8 data pins).
-
enable_pin (Required, pin): The pin you have
E(06) hooked up to. -
rs_pin (Required, pin): The pin you have
RS(04) hooked up to. -
rw_pin (Optional, pin): Optionally set the pin you have
R/W(05) hooked up to. You can also just permanently connect that pin toGND. -
lambda (Optional, lambda): The lambda to use for rendering the content on the display. See Rendering Lambda for more information.
-
update_interval (Optional, Time): The interval to re-draw the screen. Defaults to
1s. -
id (Optional, ID): Manually specify the ID used for code generation.
NOTE
If you’re not seeing anything on the display, make sure you apply 3.3V to the VEE (03 ) contrast control
pin of the board. You can use a potentiometer to make it adjustable.
Rendering Lambda
Section titled “Rendering Lambda”The LCD displays has a similar API to the fully fledged Display Rendering Engine, but it’s only a subset as LCD displays
don’t have a concept of individual pixels. In the lambda you’re passed a variable called it
as with all other displays. In this case however, it is an instance of either GPIOLCDDisplay or PCF8574LCDDisplay.
The most basic operation with LCD Displays is writing static text to the screen as in the configuration example at the top of this page.
Each of the three methods (print, printf and strftime ) all optionally take a column and row arguments at the
beginning which can be used to print the text at a specific position. These arguments are set to 0 (column) and 0 (row)
by default which means the character at the top left.
display:  - platform: lcd_gpio # or lcd_pcf8574    # ...    lambda: |-      // Print 0 at the top left      it.print("0");
      // Print 1 at the second row and second column.      it.print(1, 1, "1");
      // Let's write a sensor value (let's assume it's 42.1)      it.printf("%.1f", id(my_sensor).state);      // Result: "42.1" (the dot will appear on the segment showing "2")
      // Print a right-padded sensor value with 0 digits after the decimal      it.printf("Sensor value: %8.0f", id(my_sensor).state);      // Result: "Sensor value:       42"
      // Print the current time      it.strftime("It is %H:%M on %d.%m.%Y", id(my_time).now());      // Result for 10:06 on august 21st 2018 -> "It is 10:06 on 21.08.2018"
# (Optional) For displaying time:time:- platform: homeassistant  id: my_time
Please see Formatted Text for a quick introduction into the printf formatting rules and
Displaying Time for an introduction into the strftime time formatting.
User Defined Characters
Section titled “User Defined Characters”The LCD display has the possibility to define up to eight user defined characters occupying the characters
0 to 7 and mirrored at 8 to 15 (i.e. \x08 can be used instead of the \0 that can
be problematic in strings). Each character has eight lines of five bits, with the first line on the top
and the most significant bit on the left, meaning that 0b10000 followed by six zeros and a 0b00001
defines a dot at the upper left and lower right of the character.
display: - platform: lcd_pcf8574 id: mydisplay # ... user_characters: - position: 0 data: - 0b00000 - 0b01010 - 0b00000 - 0b00100 - 0b00100 - 0b10001 - 0b01110 - 0b00000 - position: 7 data: - 0b00000 - 0b01010 - 0b00000 - 0b00100 - 0b00100 - 0b00000 - 0b01110 - 0b10001 lambda: |- it.print("Hello, world \x08 \x07!");Try this custom character generator to design your own sybmols.
Backlight Control
Section titled “Backlight Control”With the lcd_pcf8574 the backlight can be turned on by it.backlight() and off by it.no_backlight() in the
display lambda definition. The jumper on the PCF8574 board needs to be closed for the backlight control to work.
Keep in mind that the display lambda runs for every update_interval, so if the backlight is turned on/off there,
it cannot be overridden from other parts.
With the lcd_gpio, the backlight is lit by applying Vcc to the BLA (15 ) pin and connect BLK (16 )
pin to GND. The backlight can draw more power than the microcontroller output pins can supply, so it is advisable
to use a transistor as a switch to control the power for the backlight pins.
Below an example for a typical use-case where the backlight is turned on when a motion sensor activates and
turns off 90 seconds after the last activation of the sensor.
display:  - platform: lcd_pcf8574    id: mydisplay    # ...
binary_sensor:  - platform: gpio    # ...    on_press:      then:        - binary_sensor.template.publish:            id: backlight            state: ON        - binary_sensor.template.publish:            id: backlight            state: OFF  - platform: template    id: backlight    filters:      - delayed_off: 90s    on_press:      then:        - lambda: |-            id(mydisplay).backlight();    on_release:      then:        - lambda: |-            id(mydisplay).no_backlight();